We have been investigating a problem where our open source audio engine (Pure Data) fails to start correctly, and unity entirely crashes (not the editor). Once PD has failed to load correctly, starting vinyl will only result in a crash. So we are working on getting our game playable on more computers.
For a lot of computers manually killing PD in the task manager and then restarting vinyl will make the game work. If we fail to connect with PD we kill it, starting vinyl when PD is broken doesn't kill it though. So we believed that we were unable to end the process.
However running the kill command (Process.kill() in C#) does seem to work. So now we believe unity is crashing before it gets to the point where it kills PD and tries to restart it.
There is code that could cause an exception early in the initialization process. The biggest thing we are wondering about is why Unity would entirely crash if anything there went wrong. For most of unity if an unhanded exception is raised it will just stop the thread and continue the rest of the game. However for some reason an error in the initialization of PD is cause the entire system to crash.
So we are going to look at making the code safer (try catch blocks) and hopefully we can make it more recoverable from an error.
Thursday, November 7, 2013
Wednesday, April 24, 2013
Game Graphics Assignment 13
Last assignment of the class and we were able to choose
something cool to do.
I chose holograms as the cool thing I would try to make. Since I started
learning game graphics I have been interested every time I have seen a hologram
in a game. I often will stay there in the game and watch it, trying to figure
out what they are doing.
So for this assignment I decided to look into it and see
if I could make something like it. After a short time goggling hologram shader I
found a nice post about how to implement one, step by step. Although the post
was not about how to write it as a shader but was instead how to implement it
in some specific GUI application. It still showed some specific steps that gave
the effect I was looking for. From there I would look at it and try to see how
to implement that effect in code.
For each of the parts I was able to figure out a way to
implement it.
Link to post about a hologram shader
There are 5 major effects that I implemented to get the
final look.
1. a very simple one, I used a solid color. So I started with
setting the color to float3(0.05f, 0.84f, 0.33f). This was a simple first step.
2. I calculated the fresnel effect and used that to do
transparency. This makes the edges not transparent and the parts facing you
directly are transparent. You can see the effect doing this gives.
Before Fresnel transparency

After Fresnel transparency

3. I added static to the color to add in the randomness. I
wasn’t sure whether I wanted to add the static to the color of the alpha. But I
think it looked a bit better adding it to the color instead of the alpha.
However as a programmer I wanted it to really show, if an actual artist had
this they may want it to be using for the alpha because it was more subtle with
the alpha.
For static I used code sent to me by JP, it worked well.
Although I think if I were doing this for longer I would look at trying to get
static with spatial dependency. This static is completely random. Where I think
the static could look better if there were lines of static and areas of static
rather than per pixel random static.
Here is the function I used for static.
0.5f + (0.5f * frac(sin(dot((i_texcoord + g_secondsElapsed),
float2(12.9898, 78.233))) * 43758.5453));
I multiplied that output with the color.
4. For this I added lines that move through the hologram.
For a long time I was multiplying the line by the color, so that the line was a
dark line going through the mesh. However I realized that didn't make as much
sense as doing it with the alpha. Once I tried that I liked it better. So these
lines are lines of 0.0f alpha that move through the mesh.
I did a lot of things to get these lines. One thing that I
did is that the line is based off of the pixel's world position. I weight each
of the position values (x, y and z) and use the sum of them in the calculation.
This way it is based off of the position, so the line will move along the mesh.
I can also control how the line moves, although the x and z are fairly
arbitrary, I can make sure lines are correctly moving up and down the mesh. And
the x and z are then used for more random lines.
I ended up making a function to create these lines that
would take in all the parameters needed. This way I was able to have multiple
lines easily (I ended up with 5).
Here is the function
float CreateRandomLine(in float3 i_worldPosition, in
float3 i_positionWeights, in float i_secondsElapsed,
in float
i_speed1, in float i_speed2, in float i_linePercent, in float i_thickness, in
float i_randomNumber = 1.0f, in float i_percentOfTime = 1.0f)
{
float
l_randomLine = saturate(frac((abs(((i_worldPosition.y * i_positionWeights.y) +
(i_worldPosition.x * i_positionWeights.x) + (i_worldPosition.z *
i_positionWeights.z)) - ((i_secondsElapsed - 100000.0f) / i_speed1))) *
i_speed2) / i_linePercent);
l_randomLine = saturate(l_randomLine *
i_thickness);
return
saturate(l_randomLine + PercentOfTime(i_secondsElapsed * i_randomNumber,
i_percentOfTime));
}
I built the function up slowly. It ended up being quite
complicated. But it wasn't too hard to make because I was just working with one
part of it at a time.
Here is an example of me using the function.
l_positionWeights.x = -0.5f;
l_positionWeights.y = 0.0f;
l_positionWeights.z = 0.2f;
l_finalAlpha *=
CreateRandomLine(i_position, l_positionWeights, g_secondsElapsed, 0.5f,
0.2f, 0.2f, 20.0f, 1.66f, 0.4f);
5. This was the final thing that I did. I wasn't sure if I
was going to try it, but I figured out a way to do it while at home and so I wanted
to try it. This was adding position distortion lines to the hologram. So this
would be in the vertex shader. This is much the same as the alpha lines, but
instead they will move the position of the vertices. This gives the look of the
hologram distorting and I think it really helped.
I used the same CreateRandomLine as before. But instead
of multiplying it by the alpha I multiplied it by an offset and then added that
to the position.
l_positionWeights.x = 1.3f;
l_positionWeights.y = 0.4f;
l_positionWeights.z = 0.2f;
l_positionOffset.x = 0.1f;
_positionOffset.y = -0.1f;
l_positionOffset.z = 0.0f;
l_positionOffset *= (1.0f - CreateRandomLine(i_position,
l_positionWeights, g_secondsElapsed, 0.45f, 0.35f, 0.5f, 50.0f, 1.378f, 0.6f));
l_position += float4(l_positionOffset, 0.0f);
Again with the function I was able to more easily make
more of these. I ended up with 4 of these distortion lines.
Overall I like how it turned out. I can tell a programmer
did this because all of the effects are overemphasized. I feel like an artist
would turn down a lot of what I did. But it looks good and it was fairly easy
to manipulate.
Thursday, April 18, 2013
Finally work on vinyl
The game keeps getting changed, although I think it has all been for the better. However we need to very quickly decided what we are trying to make, and although some specifics may change as we implement prototype them. We need to at least know what we are trying to put in the game. This weekend Mike is going to put together a design wiki so we can all have a reference for what we are building.
I have never had a design doc or wiki that the team has actually followed, but I hope that was because everything else I have worked on was a prototype.
A lot of the changes to vinyl come from GDC where we learned some ways that we can manipulate the audio in positive ways. So then we wanted to change the game such that it had positive audio effects built into the gameplay.
Another inspiration for change was a talk given by Gordon Durity of EA Sports. SSX does a nice job of taking the user's music and integration audio manipulation with gameplay. Another thing they did was they had an inspiration video made that was given to the production team. The video was of real snowboarding and had music added on. The development team used the video as the base for the feel they wanted the game to have.
I quickly put together a video similar to it. Although it was not just showing off the feel but also showing some mechanics I was proposing. Specifically a pause with a handstand, remixing when grinding and lowering the volume in the air.
Link to Video
The video needed a lot more time put into it. But I think it helped smooth the transition from running down a pipe dodging balls, to the more interactive mechanics with audio manipulation tied to each.
Wednesday, April 17, 2013
Game Graphics Assignment 12
I
hadn't done the directional lighting before this assignment, so that was the
first thing I had to do. With that I wanted to use functions for my shaders. Although
I did not do this for every part of my shaders, specifically the vertex
shaders, I did convert my fragment shaders to use functions.
This
caused some problems with lighting, but eventually I was able to refactor my
lighting to such a way that I could use modular functions to do the lighting.
The one problem that I found after doing this was that if I made a change to
one of the function files, it would not recompile the shader. So when I was
playing with the epsilon of my shadows function I would have to go into a
shader and add/remove a space, save and then run the game. So if I were to do
this again (presumably for something more than class) I would find a way to get
a dependency graph working for the shaders.
There
were plenty of minor mistakes I made with the code, but overall I had no major
problem with the assignment.
One
thing that helped with the assignment was the GUI. I changed my GUI item to
show the shadowmap texture which allowed me to see the lights perspective at
all times. This wasn't a life saver, but it was really easy to do and it was
helpful.

Here
is a screeshot of pix for the shadow map texture.
Everything
should be working.
Tuesday, April 9, 2013
Game Graphics Assignment 11
Hey,
This was a really easy assignment overall. it only took like 2:30 hours. But i had already drawn on screen space from game engineering.
I made a GUIQuad that had all the information needed to draw a quad on screen then made some helper functions to get the transform matrix i needed. Then i made a function that can draw a quad given that struct.
At that point i made a few super simple shaders and switch between them based on some info in the struct.
So with that i could draw the post processing effect which was just a quad the size of the screen with the screen texture, and then i could draw the gui texture which was a smaller quad with the alpha test shader.
I didn't do the directional lighting because i had done it in game engineering and i am crazy busy, so any time i can save i am taking.
Evecything should be working
Link To Code
Sunday, April 7, 2013
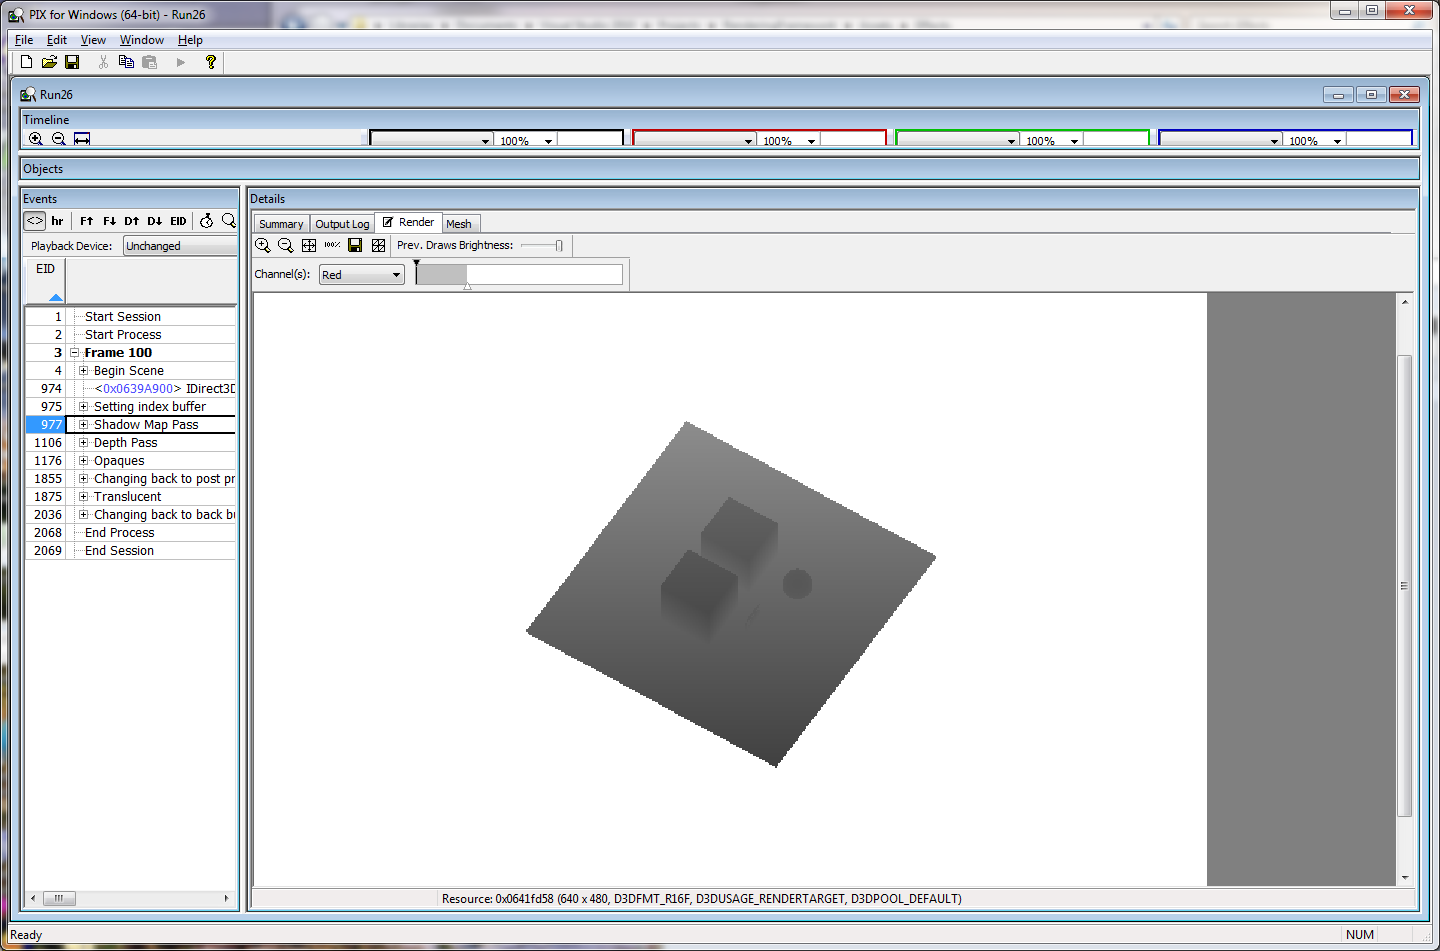
Game Graphics Assignment 10
This assignment ended up taking longer then it should have, but i am not too surprised because part of it was done on the flight home from montreal and the rest was still before my brain had recovered from Ubisoft and GDC.
The one mistake that took a lot of time was that when i was getting the index of a sampler for the shader, i was then just calling set texture even if it returned (uint)-1. This was causing pix to crash and eventually i just had to go in search of why pix was crashing to continue working on the assignment. I am not sure why it was causing problems now, i had that code in there for a few assignments. But now pix works again.
I had talked with people who were using the projected position instead of the view position, which i implemented first. However after an email from JP, i changed it over to use the view position. It makes no visual difference (that i can see) but it should be cleaner in all situations, where the projected position was a non linear depth.
Everything should be working.
Link to code
pix view of the depth texture, it is only showing the red color (because the texture is just R16F).
Thursday, March 21, 2013
Data Visualization Tool
For Vinyl we will be doing a lot of audio data parsing and manipulation. This means we will be looking at large arrays of values and making changes for them. So to do this I created an array visualization tool that can take an array and visualize it along a graph. I also wanted to be able to scroll across the data, zoom in/out and mouse over a specific value. I also wanted to be able to do this for multiple arrays either on different graphs or the same graphs.
For this I first looked for tools that already did this. The main one I looked at was Excel. But i found it would have been a challenge to dynamically make the graphs based off of the data, and different graph combinations of arrays.
Another tool i found was a C# project called ZedGraph that did a nice display of an array, and it was open source. So I used that to display the graphs. With that my tool can now display one graph with N number of arrays on it. It also can display 4 graphs at the same time.
It overall works well, but I am running into one problem I will need to look into the ZedGraph code to fix. The problem is that I am trying to draw hundreds of thousands of values, and it is slow. So i need to change the code so that when you are zoomed out far enough that you are trying to draw too much data, it will only draw some of it. The dission i have is how to bring down the data. I could display every X values. so if i want to show 50 data points and have 170. i could just display every 4th point. The other way is to average the values around it.
I think I will take the every X values so that i don't end up averaging the Waveform into 0. But I will see how it works.
Tuesday, March 12, 2013
Game Graphics Assignment 9
This was a fun one. This was stuff that I had no clue how to do coming into the assignment. It was also fun because I was able to do all of it with only one change to a file parsing, everything else worked withing the parsing i already had.
I didn't run into (major) problems at any point during this. the environment map worked the first time i compiled. And for the differed rendering part It worked once i got a few small bugs out of the code.
Although I watched the video from the class closely for this assignment.
The effect I made for the special transparent was a magnifying glass. I take the tex coords and pick the back pixel closer to the center of the cube depending on how far outside from the center I am. So the outside of the cube is getting pixel from closer to the center of the cube, while the center of the cube is getting the pixel right behind it.
Everything should be working
Link To Code
picture of pix showing the opaque bucket render target/texture
Friday, March 8, 2013
Game Graphics Assignment 8
I was very lazy to work on this assignment, but got it finished. It didn't take too long.
I did enjoy doing this assignment as I had never done normal mapping before. I didn't run into any trouble with the actual normal mapping calculations.
I did have to change my material and effect system so that the effect would declare how many textures it wanted, what type each was (diffuse and normal map are my only 2 atm), and what its name is in the shader. Then the material lists how many textures it has and for each what type it is (diffuse or normal map) and the filename.
Then when rendering I have the material and loop through each texture it has and assign it by looking up that same texture type in the effect. I should probably do it the other way around, that the effect looks up the textures it needs in the material. But I only realized that later. the way it is now if the effect expects a normal map and the material doesn't have it, I have no error being thrown. It would just render without the sampler being set (or set tot the correct thing). The other way around I would be able to have the effect warn the user that it expected a texture of type X and the material did not have one.
Ok so i was having trouble with specular light being too bright. This was because i was multiplying the light intensity with the light color and the specular intensity. So the specular was getting the intensity twice. Now only the light color gets the light intensity.
Also had trouble with the letters being not quiet right from some places. The reason was that the y values were backwards. So i redid the height map and now it works correctly. This gave me trouble because the lighting was correct when i went left and right (the sides of the raised letters that were facing the light would light up). But the top and bottom were wrong.
Everything should be working.
Link to Code
Tuesday, February 26, 2013
Game Graphics Assignment 7
Not too bad of an assignment. I had done a bit of alpha stuff in both Game Engineering and more in an XNA prototype for game projects 1.
I also didn't have to redesign much of my code. I redid how i was going the draw. Since now i needed to be able to draw objects in different orders, which meant two seperate locations for the draw call, I decided to make a function out of it. So now i have a DrawEntity function that will set all of the effect, material, uniforms that need to be changed and make the draw call.
Then for the Opaque entities i call that function in order of Effect->Material. For the transparent objects i draw them in order of distance away from the camera.
But for the files i only had to update the format for one of the file types, my effect. I added an enum (saved as an int) for whether it was transparent, additive, opaque...
The one part i didn't like is how i had to loop through every entity to check if it had a material that used an effect that was transparent, when drawing the transparent objects. It is a lot of finds that take place (2 * the number of entities you have). I couldn't think of an easy way to divide my entities into opaque and transparent. I can fairly easily do this for the effects, but i have no quick way to get all of the entities that use a specific effect.
So that section is a bit slow, but still fast enough.
Everything should work.
Link To Code
Pix screenshot of events collapsed

Pix screenshot of the Translucent events expanded

I also didn't have to redesign much of my code. I redid how i was going the draw. Since now i needed to be able to draw objects in different orders, which meant two seperate locations for the draw call, I decided to make a function out of it. So now i have a DrawEntity function that will set all of the effect, material, uniforms that need to be changed and make the draw call.
Then for the Opaque entities i call that function in order of Effect->Material. For the transparent objects i draw them in order of distance away from the camera.
But for the files i only had to update the format for one of the file types, my effect. I added an enum (saved as an int) for whether it was transparent, additive, opaque...
The one part i didn't like is how i had to loop through every entity to check if it had a material that used an effect that was transparent, when drawing the transparent objects. It is a lot of finds that take place (2 * the number of entities you have). I couldn't think of an easy way to divide my entities into opaque and transparent. I can fairly easily do this for the effects, but i have no quick way to get all of the entities that use a specific effect.
So that section is a bit slow, but still fast enough.
Everything should work.
Link To Code
Pix screenshot of events collapsed
Pix screenshot of the Translucent events expanded
Friday, February 15, 2013
Productive week
We are really getting a hang of the engine now. This last weekend i spend the whole weekend (it felt like) trying to get the push area to be spawn able I made a post on the Crytek forums asking how to do it. I got three responses within 24 hours, the last one giving me the answer. The answer was i needed to do it in c++ and not lua, although i could expose it to lua if i wanted.
Link to Post
At that point i learned that the real logic of the engine is in C++ and i should do as much in there as i can. If i want to do it in Lua i now find out how to do it in the C++ code then find corresponding function in Lua, or make the function for Lua. This has been working much better. And now that i have been playing around with the C++ so much, and reading their functions, i have a much better understanding of the engine.
I love being able to hit F12 and see the class or function, with some documentation (Video game documentation, crazy germans). also being able to find the references to the functions so i can see them in use.
And the rest of the team is also getting a lot more done with the engine. We have gotten over much of the learning curve and are really starting to make progress.
Game Graphics Assignment 6
This ended up taking longer than i thought it would. but still didn't take too long.
Once i read that we were making a Maya Exporter i dreaded the assignment. After making an FBX parser for Game Engineering i was not looking forward to dealing with that api again. However all of the maya stuff was already done, and that part of the assignment was super easy.
The binary file part was very easy too, I deal with binary files all the time with my work on the search engine
And as for putting all the vertices and indices in a block, again I had to do that for game engineering 2.
I also changed around the pix events for this assignment (and replaced the zip for the last assignment) because i had them implemented incorrectly.
everything should be working
Link To Code
Picture of pix events, fixed.
Monday, February 11, 2013
Game Graphics Assignment 5
Overall not too difficult of an assignment. Took some time, but not too bad. I am not sure what was taken out of the assignment, would be interested to know how much more work the original assignment was.
I had implemented specular lighting before (for game engineering 2), so i didn't have much trouble there. Had to play with which direction the normal should face a bit, but got it quickly.
One thing that came up was that i had the wrong arguments to my draw call. It wasn't an issue because i was only daring a single box (so all the offsets were 0), but adding the floor caused problems. After taking a look at my draw call in my engine, it was quick to switch the arguments around and get it drawing the floor.
The biggest part decision wise was how to structure the uniforms. I changed how i was doing it twice while developing it. But I ended up with a nice system that can take any size of a float array and set it only when it needs to be set. How i do this is every time i set a uniform i keep track of its name and value. Then when i try to set the next one i look to see if it is already set. In this case even if i change materials, if they both have the same uniform (name and value) it will not set it again. This all gets cleared when i change the shader.
Everything should be working in the assignment.
Link To Code
Picture from pix debugging
Friday, February 8, 2013
Game Graphics Assignment 4
this assignment took a large amount of time, but was not too difficult. I make may own file format every few weeks it seems, so that was simple. I had already been separating out my code into classes so all i had to do was add in a new class for each part of this assignment.
I was deciding between having a manager class for each of the new types of things. then i could either pass those around or make them all singletons. That way when the material file was loading it could tell the effect manager to load an effect that the material just read. However i decided to instead keep all of the class instances in the scene class and have the scene class be the one that calls load for each object.
So the entity class has its load function called. that function opens up and parses the file. It then returns the names of the mesh and material that it uses. The scene file then will look to see if that mesh has been loaded, if it hasn't then it creates a new Mesh instance and calls the load (giving it the filename).
So each class object has its own information and the name of the other objects it needs. So when i draw i ask for each objects information. The entity returns its world transform and the name of the mesh and material it uses. The scene the looks the mesh up and calls for its information, which returns the vertex buffer offset and index buffer offset.
Everything should be working, as long as i didn't miss something.
To move the camera use w, a, s, d
To move the light use the numpad:
numpad 8: up
numpad 2: down
numpad 4: left
numpad 6: right
numpad 7: in (-Z)
numpad 9: out (+Z)
here is a screenshot of the depth buffer in pix

final week of preproduction?
Well we think we have the final version of the game. at least before Gate 1. We really don't have time to change again before Gate 1 anyway.
But I am happy with the game we have. It has two very nice parts about it. One is that the gameplay is very similar to the Impulse prototype. So we know if we can get it executing it will be fun to play. The other nice thing is that it is something i would be proud to talk to an industry professional about this game. because it takes a game, breaks it down into its formal elements and then puts the game back together one formal element at a time.
The rest of my time has been spent trying to get the force push to work. However i have not been able to get it to work. I have been trying to create the entity as an area box, load a model as a collision box. I think the next thing i will work on will be loading a model and using it as collsiion geometry. I spent some time with it, but not enough. and I believe if i get it right it will work.
Friday, January 25, 2013
Game Graphics Assignment 3
this assignment wasn't too bad. I had extra time early and decided to get this out of the way. I had done all of this in game engineering already. In that class we had to do per vertex and per pixel lighting with both diffuse and specular. So doing per pixel diffuse lighting was simple. All of the specific function calls i just looked at my old code for.
To move the camera use wasd (there is no forward and backward, the camera always faces 0, 0, 0)
up: w
down: s
right: d
left: a
To move the light use the numpad
numpad8: Up
numpad2: Down
numpad4: Left
numpad6: Right
numpad7: +Z, towards the camera at first, then passing and going behind the camera
numpad9: -Z, away from the camera
The main problem i had is that i forgot how assert works. I had put a function call in the assert statement. So when i went to release mode that call was optimized out. Other than that it went fairly smoothly.
One thing i did do that i wasn't sure if i should have or not was i took out the color from the vertex. We aren't using it and without the color it is 32 bytes instead of 36 bytes. I can easily add it back in if we use it later.
Everything should be working. Although i can't always tell if the lighting is correct or not.
http://www.eng.utah.edu/~codyh/u0789429-Graphics-Assignment-3.zip
I wasn't entirely sure what you meant by the texture resource in pix. i double clicked on the texture and got a picture of it. So i think that is what you mean.
Wednesday, January 23, 2013
CryEngine
I am loving this engine so far. i have broken a few things, but overall i love it so much more than UDK.
It has an sln file for visual studio so you can just open that up, look at the code and run it (once you set the launcher.exe to run on debug). At that point you can put a breakpoint in the code and walk through the c++ code of the engine. It is really nice to be able to see the code of the engine running, and follow it around.
I setup version control for the engine too. I am using perforce which i really love so far. Although one of the levels broke and cannot be loaded on one of the computers. Not sure how much of that was version control.
Also figured out how to work on the same scene as other people. If you are both working on different layers of the same scene, then you can both work and have the final include both of your changes. So we can divide the level into areas and parts, so i could be editing the spawn of the enemies and someone else could be editing the platforms. we both save our changes (they get saved to different files, one for each layer) and then when you load the scene it loads both layers. Much better than unity for that. Although there is no real merging, at least multiple people can work on a scene, as long as they are coordinated that they are not both making changes to the same object. One way to make sure of that is to check out the layer file you want to edit things in. that way you can see if someone has that layer checked out and don't edit it until the check it back in. We will see if the rest of the group works well with perforce or not, it isn't as easy as svn but it gives a lot more power.
Game Graphics Assignment 2
This assignment i completely reworked the structure of the code. renderer.cpp has about 50 lines of code now. i made a class for the camera, scene and geometry. I hope later assignments have us using multiple pieces of geometry because my code can handle any number of geometry.
I had to change cMainWindow.cpp and .h to make the WaitForShutdown function not const. I needed to do this for handling input, which changes the position of the camera and box, therefore they cannot be called from const functions. So now the Update function is not const, and there is a const Draw function that is called at the end of the Update. I could change it so the window calls the update then the draw, but eh.
I spent a lot of time reworking the code, but it was broken for a fair amount of time. I finally realized i was multiplying the matrix and the position in the wrong order in the vertex shader. so i was doing
mul(matrix, position) instead of mul(position, matrix).
once i fixed that the whole thing worked. Although i had a memory leek because i forget to release the vertex declaration, but found and fixed that too.
Everything should be working
Link to Code
To move the box you use the numpad
Move Left: numpad 4
Move Right: numpad 6
Move Up: numpad 8
Move Down: numpad 2
Move Rotate Clockwise: numpad 7
Move Rotate Counter-clockwise: numpad 9
to move the camera use wasd
Move Left: a
Move Right: d
Move Up: w
Move Down: s
pictures:
Thursday, January 17, 2013
Game Graphics Assignment 1
This assignment was mainly about learning to use the pipeline that John-Paul made. To be able to create another project tool and get it working with the pipeline. then to make some change to the vertex and pixel shaders.
The pipeline was different, but not too hard to understand. All of the rest (creating my own file format and shaders) i have done before. So overall the assignment went smoothly.
Link to code
Everything should be working. the vertex shader puts a sin wave through the position and moves them left and right (+- x value) based on the position on the screen. so the closer to the top the more it sways, and when it goes below the middle it sways the other way.
The pixel shader takes the color from the vertex shader (which is the x and y value as the red and green) and multiplies it by a sin wave so that the rectangle fades in and out.
The format for my "mesh" file is as follows.
[number of tries]
[x 1-1] [y 1-1]
[x 1-2] [y 1-2]
[x 1-3] [y 1-3]
--------------
[x 2-1] [y 2-1]
[x 2-2] [y 2-2]
[x 2-3] [y 2-3]
--------------
the line with the "------------" is a trash line for ease of reading, the parser just reads that line and forgets it. that also means that line could contain things line the name of the object and which triangle number that is. But atm it just separates the triangles.
Here are screenshots of debugging the vertex shader and pixel shader in Pix.

Tuesday, January 15, 2013
Pitch Week
Good start to the week with game pitches. I didn't work on mine very much and didn't practice it at all but it went fairly well. Since i already had a working prototype, it was pretty easy to turn that into a pitch.
watching the other pitches i was interested in some of them a lot. there were a few that i would rather make then my own game. the game vinyl sounded really fun to program. decomposing audio files and creating a level based off of the song could be really cool.
I am looking forward to seeing which games get picked. My biggest wish is that we can do the games in udk or cry (i favor cry a bit more). But i really want the experience of having a published game in udk or cry. I feel (and have heard) that those engines are much more similar to engines major studios use. Where experience with unity is good, but is not as impressive to industry professionals as UDK or cry. my preference for cry is that it is 5 years newer than UDK and being a student that publishes a game using the cryengine would be a very impressive statement to say. It also looks beautiful.
Subscribe to:
Posts (Atom)